MediaPipe介紹
這個是真的,首先需要從Google在2020年發布的mediapipe開發包說起,這個開發包集成了人臉、眼睛、虹膜、手勢、姿態等各種landmark檢測與跟蹤算法。
https://google.github.io/mediapipe/請看下圖比較詳細
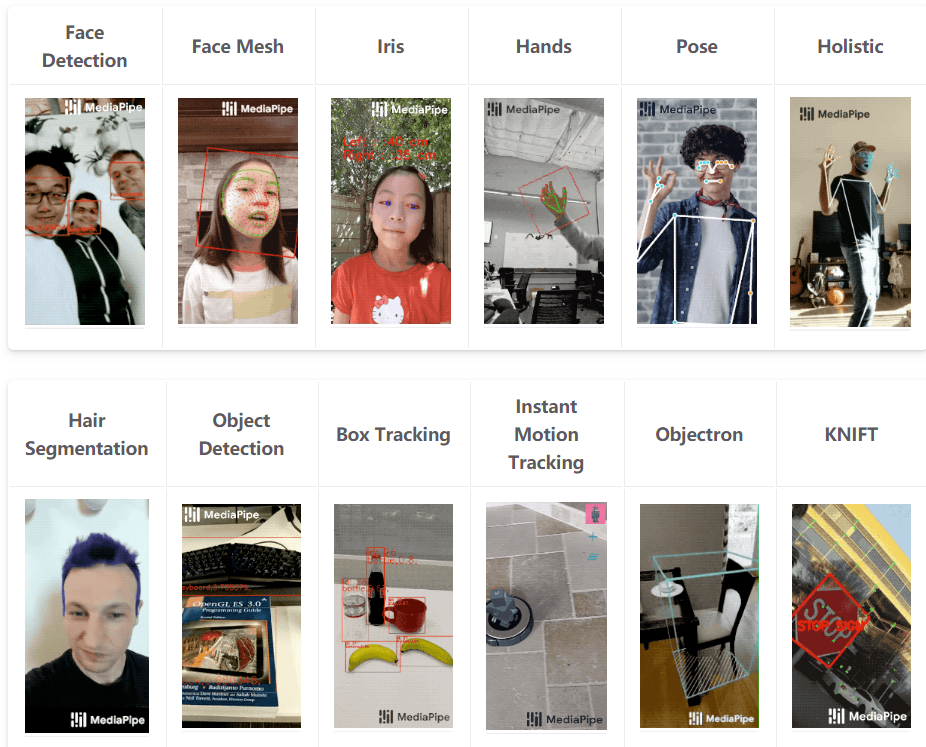
是個不折不扣的現實增強的寶藏工具包,特別實用!支持的平臺跟語言也非常的豐富,圖示如下:

只說一遍,感覺要逆天了,依賴庫只有一個就是opencv,python版本的安裝特別簡單,直接運行下面的命令行:
pip install mediapipe
手勢landmark檢測
直接運行官方提供的Python演示程序,需要稍微修改一下,因為版本更新了,演示程序有點問題,改完之后執行運行視頻測試,完美get到手勢landmark關鍵點:
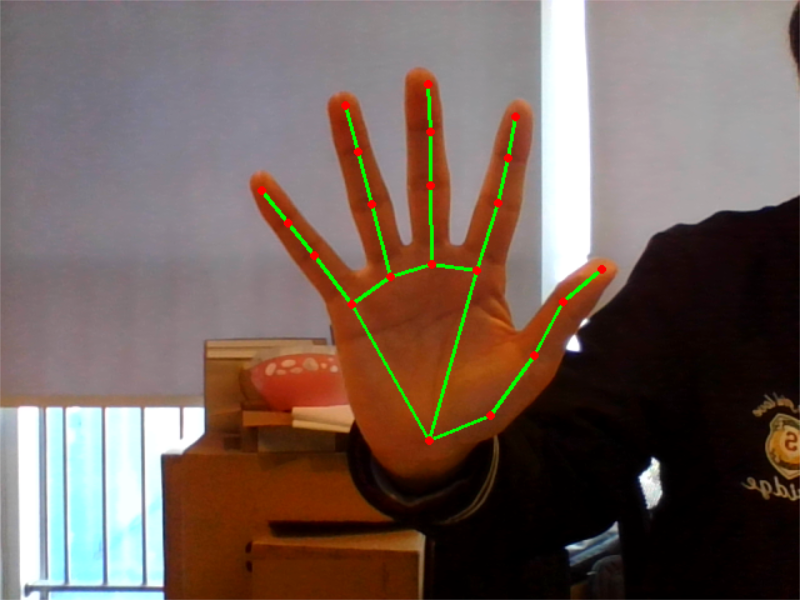
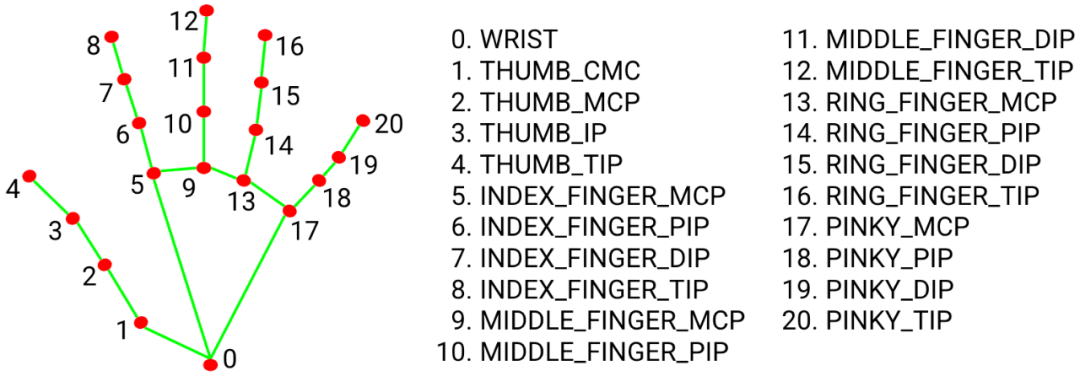
手勢landmark的關鍵點編號與解釋如下:
修改后的代碼如下:
import cv2
import mediapipe as mp
mp_drawing = mp.solutions.drawing_utils
mp_hands = mp.solutions.hands

# For webcam input:
cap = cv2.VideoCapture(0)
with mp_hands.Hands(
    min_detection_confidence=0.5,
    min_tracking_confidence=0.5) as hands:
  while cap.isOpened():
    success, image = cap.read()
    if not success:
      print("Ignoring empty camera frame.")
      # If loading a video, use 'break' instead of 'continue'.
      continue

    # To improve performance, optionally mark the image as not writeable to
    # pass by reference.
    image.flags.writeable = False
    image = cv2.cvtColor(image, cv2.COLOR_BGR2RGB)
    results = hands.process(image)

    # Draw the hand annotations on the image.
    image.flags.writeable = True
    image = cv2.cvtColor(image, cv2.COLOR_RGB2BGR)
    if results.multi_hand_landmarks:
      for hand_landmarks in results.multi_hand_landmarks:
        mp_drawing.draw_landmarks(
            image,
            hand_landmarks,
            mp_hands.HAND_CONNECTIONS)
        cv2.imwrite('D:/result.png', cv2.flip(image, 1))
    # Flip the image horizontally for a selfie-view display.
    cv2.imshow('MediaPipe Hands', cv2.flip(image, 1))
    if cv2.waitKey(5) & 0xFF == 27:
      break
cap.release()
手勢識別
基于最簡單的圖象分類,收集了幾百張圖象,做了一個簡單的遷移學習,實現了三種手勢分類,運行請看視頻:
掃碼關注
OpenCV開發者聯盟,
專注各種語言的OpenCV開發教程分享
OpenCV周邊開發技術應用!

掃碼查看OpenCV+Pytorch系統化學習路線圖

推薦閱讀
CV全棧開發者說 - 從傳統算法到深度學習怎么修煉
Pytorch輕松實現經典視覺任務
教程推薦 | Pytorch框架CV開發-從入門到實戰
OpenCV4 C++學習 必備基礎語法知識三
OpenCV4 C++學習 必備基礎語法知識二
OpenCV4.5.4 人臉檢測+五點landmark新功能測試
OpenCV4.5.4人臉識別詳解與代碼演示
OpenCV二值圖象分析之Blob分析找圓